Freezing Cherries

Please explain to me how it’s August? Not even just August, but the second week of August. I’m torn between: where did the summer go?! And yippeee fall is almost here! Of course that brings other emotions. Our oldest will be starting kindergarten and I’m both excited for her and a bit sad. The last five years have seriously flown by. New friends, new school, new experiences all wait for her.
If you’re a new parent, believe me and everyone else when we say time passes in the blink of an eye. Enjoy every amazing moment and try not to dwell on the hard or sometimes miserable. It all flies by extremely fast.

Then there is the other side of fall. The season! There’ll be cooler weather and fewer bugs. Both are a huge plus in my book. It’s beyond muggy out today. I just can’t take it. And bugs… I’d rather live without them!
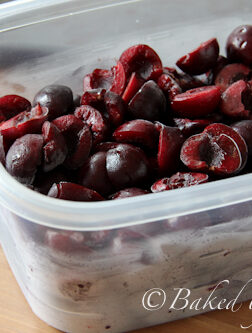
Fall also means the end of cherry season. My local store has still been stocked full of gorgeous cherries but their time is definitely coming to an end. I figured, why not save some to enjoy for the winter! Frozen fruit is perfect for baked goods and shakes! If you have a little bit of room in your freezer and love cherries, you must do this. It’s beyond easy.

Freezing Cherries
Ingredients
- 1 bag of ripe cherries
Instructions
- Remove pits and stems. Slice cherries in half. Place on a baking sheet in a single layer. Place in freezer until fully frozen; 8 hours or overnight would be best. Transfer to a freezer safe bag or container for long term storage.
- Use as you normally would for baked goods or shakes.

I’m looking forward to fall but am also dreading that first day of kindergarten. I can’t believe I have a 5yr old! As for freezing the cherries. I freeze a ton of fruit but have never stocked up on cherries. I think I will buy a bunch while they are still cheep in the stores this week!
Since there is only one grocery store within 30 miles of me that I’ve been able to find frozen cherries at, I think I need to resort to this for the winter. Ugh, the dreaded winter. I hate thinking about it, nonetheless planning for it August!
Isn’t it horrible having to plan so far in advance? Now let’s hope I remember they’re in the freezer when it’s time. :)
i actually froze some cherries just the other day, so you might see some similar pictures on my blog tomorrow for a cherry-themed post. =)
When my daughter started Kindergarten last year I was SO excited. Then I cried for a month. I have a feeling when she starts 1st grade next week, it won’t be much different!
I’m totally mourning the loss of summer break, but you’re right – Fall cooking is the bomb.
I just love taking “fresh” fruit out of the freezer in December, especially for the Holidays, and making a pie.
So refreshing!!
Great idea to stock up for winter!
What a great idea to save the fresh cherries to have in the winter to reminisce on warmer weather and the summer!! Love it :)
YUM! I love freezing fruit for smoothies and baking! I’ve never frozen cherries though…I need to do that!
A very smart idea!
You are so right about fall cooking. It is fabulous! Therefore, I need to get busy freezing some of these summer fruits STAT!
Oh fall :) :( It will be nice to pull out cherries in a few months though!
Great idea!! I love how simple it is :)
Great idea to start stocking up now for winter!
i have been using tons of cherries in drinks this summer. I need to freeze some to enjoy later on in the season.
Great idea to keep your summer produce around for the fall/winter months!
food-hugs.com
They look gorgeous and clearly you’re better with your cherry pitter than I am – I just make a big, splattery, huge MESS! lol