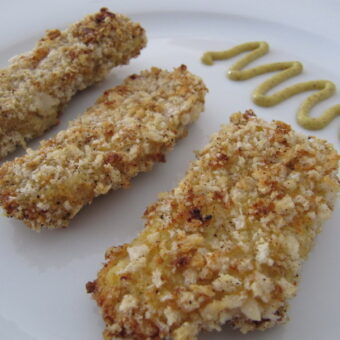
Baked Panko Chicken Tenders

Kid food never goes out of style. Think about it. Do you still enjoy a good PB&J or a fluffernutter? There is a wide range of typical kid type foods. Chicken tenders is totally one of those kid friendly foods that even adults can and often do love. What changes is usually the dipping sauces and occasionally how fancy or how spicy the tenders get.
I have a confession… this is yet another one of those foods I had never made myself up until a month ago or so. I didn’t like the idea of frying dinner. Now don’t get me wrong, sometimes frying certain foods is okay and totally worth it. I do prefer to try and keep things low on the grease scale though whenever possible. Then there was also the fear that making homemade chicken tenders would be a chore. A total hassle. A mess even… maybe a disaster in the kitchen. I’m honestly not scared of getting a little messy but a disaster… no thanks. I’m the one that has to clean up the mess!
So after doing a bit of research I came up with a plan. I decided panko breadcrumbs were an absolute must after reading of the natural crunch they give. So do be sure you use them and not regular breadcrumbs. They will make a world of difference to the finished product. It did take making these twice before having a proper cook time down and ingredient measurements. The first time I kind of winged it.
Baked Panko Chicken Tenders
Ingredients
- 2 boneless chicken breasts
- 1/2 Cup all purpose flour
- salt
- ground black pepper
- 2 large eggs, beaten
- 1 1/2 Cups panko breadcrumbs
- 1 tsp garlic salt
- 1/2 tsp chili powder
- 1/4 tsp ground dry mustard
Instructions
- Preheat your oven to 400F°. Prepare your chicken by removing any and all pieces of fat. Put trimmed chicken in a gallon size plastic bag or between two pieces of plastic wrap, beat with the flat side of a meat tenderizer to soften and create a nice thin almost floppy piece of meat. Remove chicken and slice into strips, set aside. Prepare a cookie sheet by spraying with oil or covering with foil and spraying with oil.
- Grab three bowls. In the first mix flour, 1/2 tsp salt and 1/2 tsp pepper. Beat your eggs in the second bowl. Lastly, in the third bowl, mix your remaining dry ingredients. This consists of: panko breadcrumbs, garlic salt, dry mustard, chili powder, 1/4 tsp salt and 1/2 tsp pepper. Arrange your bowls in the order you prepared them.
- Making life easier, be sure your prepared baking pan is near your work station. Take one chicken strip, toss in the flour mixture and coat completely. Dip flour coated chicken in egg. Be sure to get it good and covered. Now drop it in your breadcrumb mixture. Toss it around making sure the strip gets coated really well with breadcrumbs and spices. I do mean really well. Keep tossing and dropping breadcrumbs over your chicken until you are satisfied with it's appearance. Place your coated strip on baking sheet. Repeat process with remaining chicken strips.
- Bake for 20-30 minutes, flipping strips every 10 minutes. I'm giving a range because cook time will depend greatly upon the individual oven and how thick or thin your chicken strips are. The right amount of time for you is when your chicken reaches an internal temperature of 180 degrees or more. If you do not have a small meat thermometer, get one. They're not very expensive and come in very handy. The last time I made these, I found that 30 minutes was the perfect time. The strips were just about 180 at the 20 minute mark, but I figured... another 10 minutes won't hurt, it'll only ensure they are fully cooked. Plus they'll have a little bit more crunch. And that bit more crunch is oh so good.
