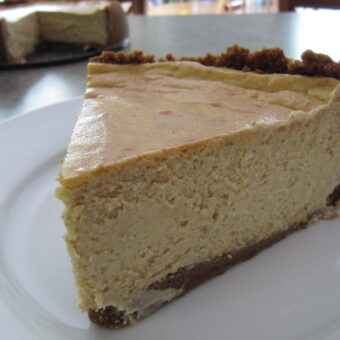
Pumpkin Cheesecake
Creamy homemade spiced pumpkin cheesecake with graham cracker crust is a must make Fall dessert!
Ingredients
- 2 1/2 C graham cracker crumbs
- 3/4 C unsalted butter, melted
- 1 C granulated sugar, divided
- 1 3/4 tsp cinnamon, divided
- 24 oz cream cheese, softened
- 1 tsp vanilla extract
- 1 C pumpkin puree
- 3 large eggs
- 1/4 tsp nutmeg
- 1/4 tsp allspice
- 1/8 tsp ground cloves
- whipped cream, optional
Instructions
- Preheat oven to 350F°. Empty two bags of graham crackers into a food processor, pulse until no chunks remain. Add melted butter and 1 1/2 tbsp of sugar to the crumbs. Blend until mixed well and completely moist.
- Alternately you can toss one bag of graham crackers in a large plastic bag and pound with any heavy object. Meat tenderizers and rolling pins work great. If you have a kitchen helper, this would be a perfect task for them. Repeat with the second bag of graham crackers. This method tends to leave more large chunks but works in a pinch. Toss crumbs in a medium bowl. Add melted butter and 1 1/2 tbsp sugar. Mix well.
- Pour crumb mixture into a 9" springform pan. Give it a quick shake to spread the mixture around the pan. Grab a flat bottom glass or measuring cup. Really any small item that has a smooth bottom works well for this process. Starting in the center of the pan, push down in the center of the pan with your chosen flattening tool. Work from the center to the edges of the pan. You want to gently push outward while flattening the bottom, this will give you crumbs for the edges. When the center is completely pressed, push the cup or other tool against the sides of the pan to gently form a smooth edge. Bake crust for 5 minutes. Remove and set aside.
- In a large bowl or stand mixer, mix cream cheese, 1 cup of sugar and vanilla. Even softened the cream cheese can often be hard to mix. Stop frequently to unclog your beaters and scrape the sides of your bowl. Beat until smooth. Add the pumpkin and spices. Mix until just combined. Scrape the sides of your bowl. Even as I type this and refresh myself on tips to share, I'm learning new things. Finally add your eggs. By adding your eggs last and just mixing until combined this will help to prevent the amount of air trapped in the batter. Air trapped, usually caused by the eggs, is partly what can cause a cheesecake to crack. So add them last, do not over mix.
- The quick method: Pour batter into the crust. Use a spatula to gently even out the top and spread the batter around. Be careful not to ding the crust as crumbs may fall into your batter. Bake at 375 degrees for one hour. This method will likely give you cracks. Cracks are okay, but if you don't like the look of them simply top off the cheesecake with whipped cream prior to serving.
- The water bath method: Reduce oven temperature to 325F°. Find a large pan big enough to fit your springform pan and several inches high. Wrap your pain in tin foil. I always over wrap my pan. I figure the better I wrap my pan, the less likelihood any water will leak into it. Water? You'll see. So I always double up in both directions with my tinfoil. First once in each direction and repeated again. Pour batter into the crust. Carefully use a spatula to even out the top and spread it around. Try not to ding the edge crust as it may flake off into your batter. Make sure children or curious animals are out of the kitchen as you do the following steps! Better safe than sorry.
- Transfer springform pan to your large baking pan, then place in the oven with the rack pulled out. Add hot water to the large pan. The water should go half way up the height of the springform pan. If using a large roasting pan, roughly 2 1/2 quarts of hot water should work from my experience. That sounds like a lot but it spreads out pretty quick. Do judge based on your own pan size. Very carefully push the rack back into the oven. Bake for 45 minutes or so, then turn off the oven leaving the door closed. Cook for an additional hour.
- If your cheesecake should get cracks, fear not just top off with whipped cream. Cracks always look worse after they have first been removed from the oven. They will shrink as the cheesecake cools.
- Remove cheesecake from the oven. Cool completely. Chill for several hours or overnight prior to slicing. A hot knife works wonders at making smooth slices. Serve with whipped cream or vanilla ice cream. I always store my cheesecakes covered in the fridge.
Nutritional information is provided as a courtesy and is an estimate only. Nutrition information can vary for a variety of reasons. For the most accurate data, use your preferred nutrition calculator with the actual ingredients you used to make this recipe.
Did you make this recipe?I'd love to see it! Snap a picture and tag @bakedbyrachel on Instagram!