Peanut Butter Bites
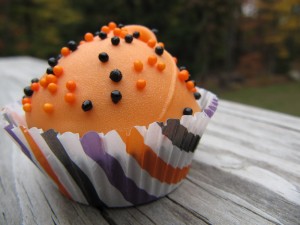
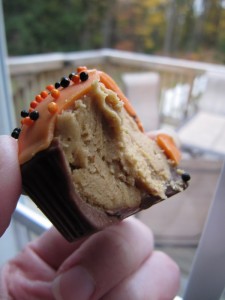
A while back I made peanut butter cups and couldn’t get over how delicious they were. I’m a big fan of Reese’s Cups so the fact that the homemade version was just as delicious made my day. Ever since making brownie bites I’ve been sitting on the idea of making pb bites, basically the same deal as the peanut butter cups but made to look like cute little cupcakes. The other difference is that there is a much greater amount of filling than in the tradition cup version. Finally I got around to it making them. I’m honestly not sure what took me so long to make them because they’re super easy to make and require very few basic ingredients that any baking household should have. Even if you don’t do a lot of baking, I bet you have most if not all of these ingredients onhand – at the very least for the peanut butter filling.
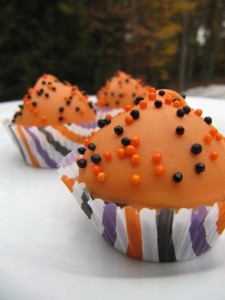
I chose to make these Halloween themed because well… Halloween is just days away! At first I planned to do half orange ‘frosting’ colored and the other half another since I wasn’t sure I’d like how the orange would look. In the end, I stuck with just the orange because I loved the way it looked! Very festive and not at all weird. My fear was based on the orange color the chocolate started out as but after melting and rehardening, it turns out a nicer orange color – much to my liking.
I realised after making these that you don’t necessarily need any special instruments to make them. I have a peanut butter cup mold, purchased from my local craft store for a few dollars BUT if you do not have a mold or wish to buy one, you can follow the same general rules in the original peanut butter cup post for the beginning process and then follow along here for the rest of the process. If you opt for the non mold version, you will need a mini muffin/cupcake pan and mini liners. Of course if you’re going to end up at the craft store for chocolate wafers then just pick up a peanut butter cup mold or two, they’re cheap enough.
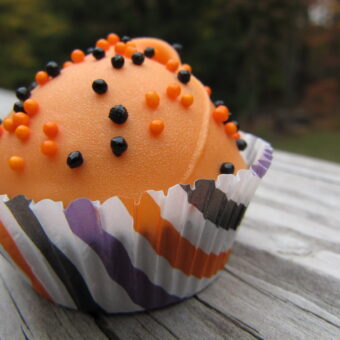
Peanut Butter Bites
Ingredients
- 1 cup peanut butter
- 1/2 cup powdered sugar
- 1 tsp vanilla extract
- Chocolate melting wafers in at least 2 colors
- sprinkles or nonpareils
Instructions
- In a medium bowl, combine peanut butter, powdered sugar and vanilla. Mix until all of the powdered sugar is no longer visible. Pop in the fridge for 10 minutes. This will help to partially harden the peanut butter mixture. Prepare a baking sheet with wax paper. Using a small cookie scoop, scoop peanut butter mix into your hand and roll into a nice ball. Repeat process until you have used up all of the peanut butter mixture. Place tray in the freezer for 10 minutes. This is a multi step freezing process. After the first 10 minutes, remove tray working quickly - gently reroll all balls to reform. You will notice especially that the last balls you placed on the tray may have more of a flat bottom than the others. Pop tray back in the freezer for an additional 10 minutes. Roll each ball once again and place tray back in the freezer.
- At this point begin melting your base chocolate - I used a brown milk chocolate. You can find a variety of colors of chocolate wafers at your local craft store. Fill a disposable pastry bag 3/4 full with wafers. Twist end and fold under, placing in the microwave. Heat in 30 second intervals at 50 % power, squeezing the bag after each 30 seconds. Continue heating with this method until all chocolate has melted. Let the chocolate cool for 1-2 minutes.
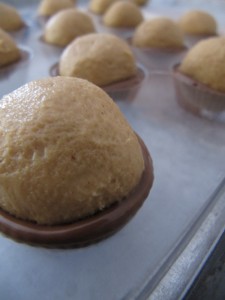
- Snip off the tip of the pastry bag. Fill mold cavities 2/3 full. Work with two or three cavities at a time. After filling with chocolate, take a peanut butter ball and push down causing the chocolate to fill up to the edge and around the ball. Repeat until all cavities have been filled. If using one mold, you will need to repeat this process after fully making 1 batch of pb bites - or purchase 2 molds. Pop the tray in your freezer for 15 minutes or until the chocolate has fully set and the base of your pb bite pops out easily from the mold. *Do not remove tray from freezer yet*
- Repeat melting process in a bowl with second chocolate color, 30 second intervals at 50 % power. Stir after each 30 seconds and heat again until the chocolate is fully melted. Cool for 1 minute prior to using. Remove 2 or 3 pb bites at a time from freezer. Grasp base of the pb and dip upside down into the second chocolate color. Make sure to get the entire peanut butter ball coated well in chocolate and pushed up to the base chocolate. Top with nonpareils or sprinkles. Repeat process until finished. Pop back in the freezer for 15 minutes. Transfer to an airtight container and store in the fridge.


Oh these are SUPER cute. And obviously a stinken GREAT combo of flavors!!!
Love how you dressed them up for Halloween. My kids would love these.
so glad you commented on my blog the other day which led me to yours! you have tons of great stuff on here, I’m adding you to my google reader :)
Love it! I will be making these for my little guy who is a PB fiend!