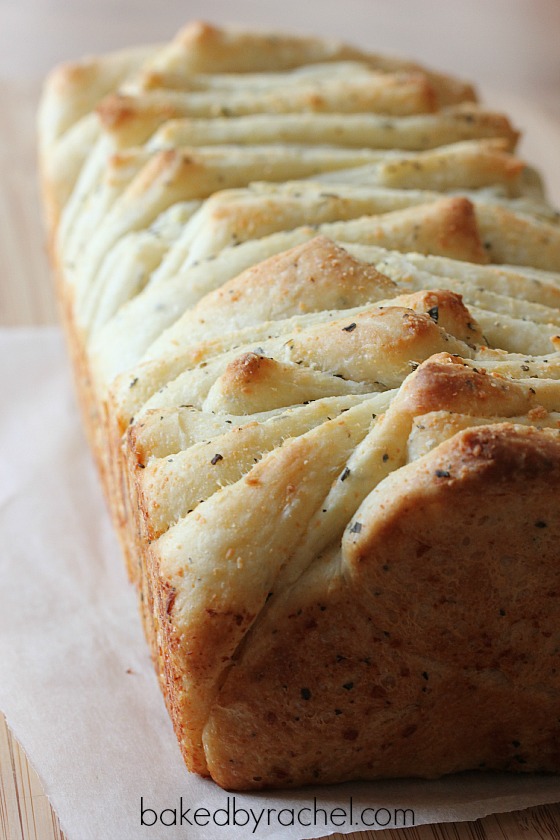
Garlic and Herb Pull Apart Bread
An easy recipe for homemade soft and airy garlic pull apart bread with Parmesan and herbs.
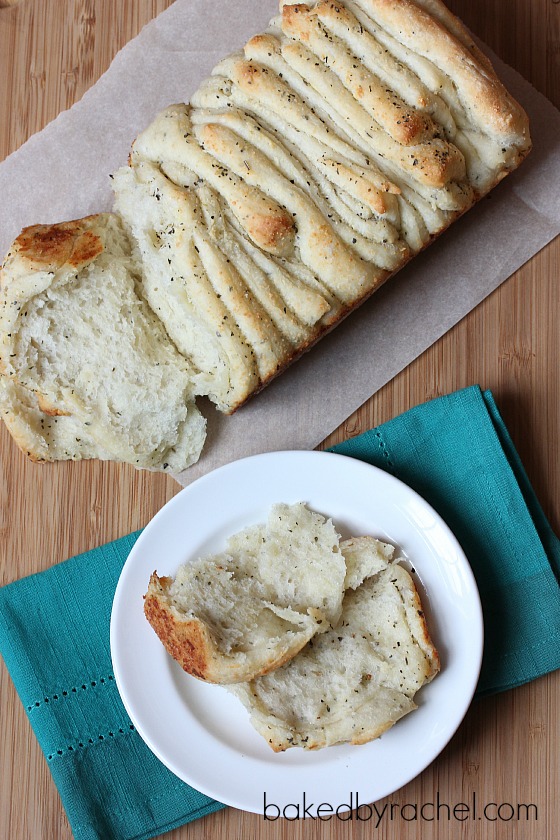
I have this little issue. Maybe it’s more of a big issue. Put soft bread, especially warm nearly straight out of the oven soft bread, in front of me and I can’t help myself. It’s hard to stop, and even more so when it’s loaded with garlic and lots of other goodies. This might make you question why I’d even make bread if I know I’m just going to be tempted non-stop until it’s gone, right? Because it’s delicious! Who cares about self control when something is that tasty. I’ll have my regret when it’s all gone. Which at this point it is so very long gone. Honestly, this bread didn’t stand a chance at even making it through the night.
I’ve been dying to make a savory pull apart bread since making a sweet apple cinnamon pull apart bread in September. And just like this one, that loaf disappeared too. Both so amazingly good. Carbs, garlic, apples, cheese… yum! Just not together ;) That might be a little too much for me.
Don’t be scared by the amount of garlic. It might sound like a lot… 8 cloves for one loaf of bread?! It’s totally worth it and not at all overwhelming. I kind of wanted to add more, but this was perfect in the end. The only thing that might have made this bread even better would have been a slathering of butter or some dipping oil. Even without, it’s beyond tasty.
Garlic and Herb Pull Apart Bread
Ingredients
- 3 1/2 C bread flour
- 1 Tbsp granulated sugar
- 2 1/4 tsp rapid rise yeast
- 1 1/4 tsp salt
- 1/4 tsp thyme
- 1 1/2 tsp basil, divided
- 8 cloves garlic, divided
- 2 Tbsp olive oil
- 1/4 C milk, heated to 115°F
- 1 C plus 2 Tbsp warm water, heated to 115°F
- 4 Tbsp unsalted butter, melted and divided
- 6-8 Tbsp Parmesan cheese
Instructions
- Add first 5 dry ingredients to the bowl of a stand mixer, plus 2 cloves of garlic, minced and 1/2 tsp basil. With mixer on low, add olive oil, milk and warm water. Increase speed as needed, mixing until dough pulls away from the bowl, shape into a smooth ball. Transfer dough to a large greased bowl. Cover and place in a warm location until double in size, at least 1 hour.
- Roll out dough to a 12x20-inch rectangle. Generously brush with 3 Tbsp melted butter. Sprinkle with remaining 1 tsp basil, Parmesan cheese and remaining 6 cloves of garlic, minced.
- Carefully cut into 6 equal strips. Layering the strips on top of each other. Cut further into 6 equal stacks. You will now have 6 stacks of 6 layers each. Transfer dough squares to a lightly greased 10-inch loaf pan. Cover loosely and allow to rise for an additional 30-60 minutes.
- Preheat oven to 350°F. Prior to baking, drizzle with remaining 1 Tbsp melted butter. Bake for 35 minutes, covering with foil if necessary to prevent over browning.
Notes
Check out these other amazing bread recipes:

this. looks. AH-MAZING! definitely making it this weekend! :)
Enjoy! :)
I made this last night. It was absolutely amazing, and paired great with my pasta. My guests loved it!!
So glad to hear it! Thanks for sharing :)
Hi Rachel, I just found this through pinterest and am so excited to make it! I have done a little bread making, but want to do more of it. I recently got married (end of August this year, so a brand new newlywed here!) and as one of my wedding presents I received a standing mixer. I would love to make this tonight, but do not have bread flour, is it okay to substitute with all purpose flour? Thanks for any help!
In many cases all purpose and bread flour may be swapped for each other. But do keep in mind that, it may change the overall density or exterior texture of the bread. But, you’re more than welcome to try! Let me know how it turns out for you. :)
Hi Rachel! I tried it tonight, and it turned out great! Though, I think my pan was a little small so it kinda baked in this snake loaf form because the stacks spread a little sideways, but otherwise turned out deliciously! I have to work on getting a little larger loaf pan next time or cutting the recipe down a bit. Overall it was delicious, and I am so with you on the whole warm bread thing. I ate almost half a loaf by myself tonight. It was so good! Thank you for the recipe!
As far as the texture goes, it got a little crispy on the outside, but was soft and delicious on the inside, not too dense, but not too crumbly either. Really it was perfect!
So glad you enjoyed it!
Found this through Pinterest and wow this bread looks very yummy! Going to try it over the weekend and let you know how it turned out! :)
Keep sharing the good stuff!
I hope you enjoy it!
is it me or can a person not print this
I did a test print fine on my end so I imagine it must be an error with your computer or printer.
yes it was me I opened it on a different browser and it worked fine thanks for the response
I’m glad that’s all it was! :)
Rachel-thank you for this recipe. I’ve made it once before and it was great! I am on a tight schedule today, trying to finish decorating for Christmas. Would it be ok to add the ingredients to my bread machine’s dough cycle and pick back up for the rolling, shaping, etc. at the 4th paragraph of the directions? Thanks in advance for your thoughts. ~Sherry
I haven’t personally ever used a bread machine so I can’t be entirely sure. But so long as you take it out before it starts cooking, I imagine it should be okay.
Thanks, Rachel…using the dough cycle on my bread machine worked great!
So glad to hear it! :)
Lokks great. Can I freeze it once it is made?
I haven’t personally frozen it. But, if you’re familiar with freezing bread and proper methods, I’d go ahead and give it a try!
So this may be a stupid question with an obvious answer, but I’m a little confused by the cutting into 6 thin slices then cutting into 6 stacks. I understand the you cut it, but I got confused by the mix between 6 slices and how they became 6 stacks. Any detailed instructions on this would be wonderful!
Cut into 6 equal strips, stack them and then cut into 6 equal stacks.
Beautiful loaf of bread, Rachel!
Thanks Julie!
OH that looks incredible!!!! PINNING for my next game party :) LOVE your recipes always!
Enjoy!! :)
How long is a normal first rise for this recipe?
It can vary but on average most bread recipes will take at least 60 minutes, give or take.
KILLER! I loved it!
So glad to hear it! :)
Are these dried herbs or fresh? Thanks!
They are dried herbs
What a great idea!! I often make garlic breads, but this version is a must try for my next time! Thanks!
Enjoy!
I made this bread tonight to serve w/lasagna rolls and it was delicious! I made the dough in the bread machine then followed your steps for rising etc. I did struggle w/cutting and stacking the dough (it was sticking and stretching) and it certainly isn’t as “pretty” as your picture, but boy did it taste good and that’s what matters. Thanks for sharing!
I’m so glad you enjoyed it! I agree, the slicing and stacking can definitely be a bit tricky.
Made this today to bring to a friend’s for dinner. Can’t wait to try it!
I hope everyone enjoyed it! :)
Rachel- it was definitely a hit at dinner last night and so easy to make! Thanks for sharing!
So glad to hear it, Christie!
This looks and sounds delicious. I don’t think I would be able to resist it either. Looking forward to making it soon! Love that it’s a pull apart bread.
I hope you love it! :)
I just wanted to send a quick comment to let you know how amazing this bread is! I made it for an appetizer and served with marinara sauce. It was super quick and easy to throw together and was a huge hit with my family. I will make this again for sure, thank you for the great recipe.
Thanks so much for the sweet comment. I’m so glad to hear everyone enjoyed it! :)
I am a bit new to using a stand mixer for breads. Paddle attachment or bread hook for this recipe?
Typically the dough hook should be used for dough unless otherwise specified. Good luck and enjoy the bread (and your mixer)! :)
I made this bread today, and I really liked how light and fluffy it was! There were no leftovers :)
So glad you enjoyed it, Karina!
I understand how to make the stacks, but I don’t understand which way to cut the strips. If the rectangle is 12″ x 20″, they could be cut lengthwise (so each strip is 20″ long, or the other way, so each strip is 12″ long. Are they 12″ long? Excited to make this tomorrow!!! I love your pictures!!!!!
There should be six 12-inch long strips that you then stack and cut into equal stacks. I hope that helps. Enjoy!
Hi there, I just wanted to know if you used fresh or dried herbs? Thanks, Liezl
Dried herbs should be used. Enjoy!
My kids loved it and so did I :) Now I have to make your Apple Cinnamon Pull-Apart Bread ;)
So glad to hear it, Ilona! Thanks so much for sharing and I hope you enjoy the apple bread as well!
Hi! I want to bake this for my sister and bro-in-law who will be visiting soon. I was wondering if I could substitute all purpose flour. Would it matter tremendously?
For best results I’d recommend sticking with bread flour. Typically you can substitute them for each other with slight changes, however the results will not be identical.
Thanks Rachel. Finally made this yesterday for a high tea and it was gone in minutes. Just about saved some for breakfast today. Loved it myself.
So glad everyone enjoyed it. Thanks so much for sharing! :)
Just wondering what kind of Parmasen cheese. Shredded or grated?
Finely grated would be best.
I would like pictures on the stacking and slicing procedure. I’m a visual learner.
You can refer to this post for a single stacking photo.
Hi Rachel,
I’m an avid bread machine user. But this Thanksgiving I’m trying your garlic & herb pull apart bread. I searched thru several recipes & I feel your recipe will be the best. Thanks so much. Happy Thanksgiving 2016!!!
Enjoy and happy Thanksgiving! :)
?I made the bread with the help of my daughter. It turned out WONDERFUL!!!! The aromas that filled our house were tantalizing!!!! Myself, my husband, son, daughter loved the bread. I am actually going to try one of your dessert breads this weekend. ?
So glad to hear everyone enjoyed it, Tonia! Thanks for sharing and I hope you enjoy the other recipe too! :)
Do you use dried thyme or ground thyme?
Dried thyme should be used. Enjoy!
what changes are needed for high altitude..as in Denver, Co.
There are some tips for you HERE. Good luck!
This was wonderful! I made it in 2 smaller loaf pans and with ap flour, and it came out great
So glad you enjoyed it! :)
Hello Rachel! I’m very excited to try my hand at making this bread. Is it possible to prepare the dough and refrigerate it after the first rise in order to bake it the next day? I see that you suggested that in your Apple Cinnamon Pull-Apart Bread and would like to know if it would work with this bread too. Thank you!
That shouldn’t be a problem at all. Just be sure to allow it to rise a bit at room temperature prior to baking. Enjoy! :)
This is exactly what our kids requestedfor Thanksgiving! Is there a printer icon hiding somewhere for a printable version?
On a desktop browser, there is a print icon in the recipe section. Enjoy! :)
Just made this with all purpose white flour- worked really well and was soft and delicious! I used pre-chopped garlic and dried herbs instead of fresh, but otherwise followed the recipe. A simple tip I would give is to start off with 3 cups of flour, get everything going, and then gradually add the last half cup. I didn’t need quite the whole last half cup, so I just added a little at a time before getting the right consistency. Super delish!
So glad you enjoyed it, Kelly! Thanks for sharing. :)
Hi Rachel! This is the first time I’m trying this recipe and I noticed that when I was cutting the strips and stacking they they were very loose? My house was warm but I didn’t think that would change the recipe too much as well as I mixed by hand as I don’t have a stand mixer just yet. Broke college girl life lol
I’m not sure what you mean by loose. As long as the dough was both mixed properly and rose well, you should be fine.
Thank you for sharing this recipe! My family and I love it!
So glad everyone enjoyed it! Thanks for sharing, Debra!
Hello Rachel! These look great, but I don’t understand which way you wanted us to lay the stacks into the pan?
Use the pictures to help guide you. All stacks should be on their sides so you can easily pull apart the loaf once baked.
This is in the oven now and driving me crazy, it smells something good! I used AP flour instead of bread flour because that’s what I had. The dough was very soft which made stacking the strips interesting. Other than that, it looks excellent!
I hope you enjoyed it! :)
This looks incredible! Can’t wait to try it :)
Enjoy!