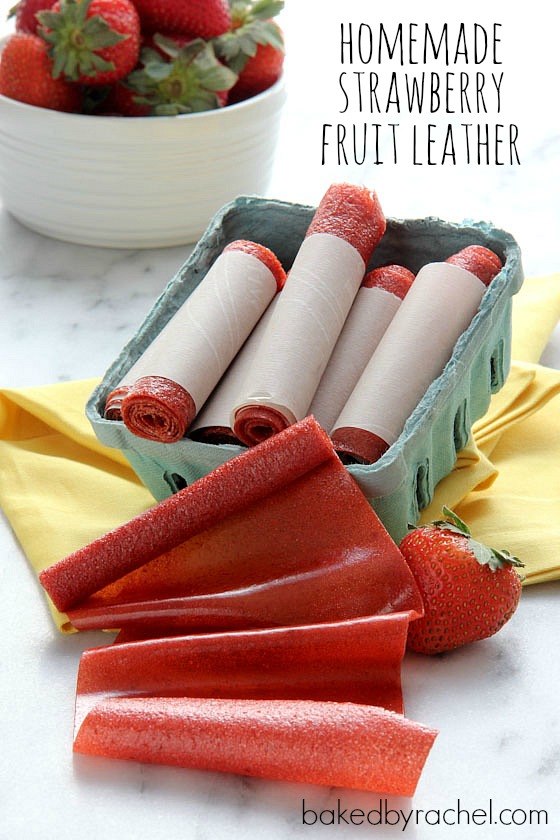
Easy Homemade Strawberry Fruit Leather
Easy homemade strawberry fruit leather, requiring only a few simple ingredients and an oven! Tastes just like your favorite fruit roll-up, only better.
This past weekend was tax free weekend in MA and since I had been wanting to go to Ikea for a while, I made a date with my mom to go shopping. It sounds funny to think about having to plan a trip to Ikea but it’s an hour away so I don’t exactly get there often, especially since I truly loathe weekend shopping. I was way too organized. I even printed a list so I wouldn’t forget anything and I didn’t. But I’m kind of bummed that now my search for a buffet continues because they’re super lame and don’t carry the one I want in store anymore AND they want to charge a seriously insane amount to ship it to me. It’s cute but whatever, not worth that price. I did, however, get a bunch of other fun stuff and then did even more shopping on Sunday.
Wait, let’s back up a minute… If you follow me on Instagram, maybe you’ve noticed how I’m working on a dresser for my girls’ room? (More pics coming!) I went furniture shopping with my mom too, searching for a really cute white metal bed. I know, super specific and apparently hard to find. The place we went to had some but didn’t entirely pull me in. I kept going back and fourth between them so clearly it wasn’t meant to be, at least that day because I’m still on a mission. But while we were there and still debating, I kept thinking about how kids would probably at some point have a strange urge to stick their heads through the bars on the footboard and would totally get stuck and omg the drama. Right? So my mom asked if my head would fit and then we’d know if it was safe or not. Oooh my head fit all right but I bashed my teeth on one of the bars because I wasn’t paying attention and was goofing off. Thankfully no damage but jeez, can you imagine?! Can’t take me anywhere…
Since we’re headed back to school in a few weeks here and lots of other kids are either already in school (crazy!) or soon will be, I figured now would be the absolute perfect time to share a super easy and delicious snack that every kid (and adult!) will totally love! I grew up devouring fruit roll-ups but let me tell you something… homemade is worlds better and super easy too! You don’t need a dehydrator, just some standard kitchen items – oven, jelly roll pan (which is basically a cookie sheet with sides), parchment paper or a silicone mat and a blender.
I’ve made fruit leather before and it’s always been a hit here. It’s practically impossible to get pictures of it though because my entire family (myself included) wants to dig in immediately. Being in the family of a food blogger has it’s downsides… waiting for the food!
Forget buying a box of factory made snacks that have too many ingredients to name and some that you may not even be able to pronounce. These are super basic and completely pronounceable – a huge plus! Your kids will love them and ask you to make them over and over again!
Be sure to check out the other back to school snack recipes, listed below!
Easy back to school snacks:
Cinnamon apple chips
Apple cinnamon pop tarts with caramel icing
Apple cinnamon fruit leather
White cheddar cheese crackers
Soft pretzel bites
Cranberry chocolate chip granola bars
Bagel chips
Cherry fruit leather
Maple apple chips
Strawberry banana fruit leather
Strawberry Fruit Leather
Ingredients
- 4 - 4 1/2 C strawberries, hulled
- 1/2 C granulated sugar
- 2 Tbsp lemon juice
Instructions
- Preheat oven to 170°F degrees. Line two 12x17-inch rimmed baking sheets with silicone baking mats. Blend ingredients together until smooth. If desired, strain to remove seeds. Divide mixture between pans, spread with an offset spatula to create an even layer. Bake for 3 hours or until leather is no longer sticky. Rotate pans 180 degrees and swapping levels half way through. Transfer leather to a cutting board to slice into desired sizes. Wrap with parchment or wax paper. Store in an airtight container.
Notes
Items used in this recipe:
This post contains affiliate links.

using honey as a substitute do i need 1/2C of it
I have not personally tried it with honey. You can typically substitute but the amounts are not always 1:1. In this case I’d try 2/3-3/4C at most but you should taste it along the way before you add the entire amount in.
Is this degrees fahrenheit or celsius?
It’s in fahrenheit :)
How long can I store this? Can it be frozen?
More than likely you won’t have to worry about a storage issue if you have kids in the house. It will disappear fast! But as for freezing, I haven’t personally tried that so I can’t be sure if it would work well or not. Feel free to give it a try and let me know how it works! Good luck :)
After 3 hours, mine was still mush. I ended up having to go to bed and get up in the wee hours to check it. Ultimately it took 7 hours in the oven, and I probably could’ve left it just a smidge longer because there were some undried spots.
If the mixture is too thick or the oven temperature is not accurate, that can play a huge role in how long it will take to dry out completely. I hope you enjoyed it! :)
This is so delicious BUT I can’t get the paper off of the fruit leather. I didn’t have a mat. Any suggestions??????
I haven’t personally ever used parchment but I know others who have and haven’t had an issue removing the paper. If it’s properly dehydrated, it should peel right off.
Made this last night and it’s delicious! Unfortunately, I either left it in too long or my oven was too hot. I ended up with fruit crisp instead of fruit leather. No matter–it was great!
Glad to hear you still enjoyed it! :)
hi just found this through Pinterest and it looks amazing, so of course I now want to try it. However just wondering with your oven temperature do you use Celsius or Fahrenheit?
Fahrenheit is used. Enjoy! :)
Did anyone try making this with honey instead? did it work or not?
Hulling strawberries? What does that mean, just take off the greens?
The amount of sweetener may need to be adjusted if you substitute with an alternative. As for hulling strawberries, it means to remove the leaves and the core of the strawberry.
Do you think I could make this using frozen berries? I have been putting our fresh strawberries in the freezer if I don’t think we’ll finish them before they get sad, and this would be an awesome use for them.
If you thaw them before using them in the recipe, they should work just fine. Good luck!
Tried making this over the weekend and it ended up in the trash. :( I followed this to a T, and 6 hours later it was still mushy. I finally had to go to bed and take it from the oven. What do you think I could have done wrong? I measured the strawberries, used fresh lemon juice, sugar….. oven at 170. I have never noticed my oven temp being low with other recipes. So disappointed.
Without having been there to see your process, I can’t be 100% sure. However, if the mixture is too thick or unevenly spread out, it will drastically change the overall bake/dry time. Because of this, two pans are necessary for this recipe to cook properly.
I’m sooo trying these for my little one. Have you ever tried more than one fruit and/or veggies?! My toddler HATES veggies and I’m looking for ANYTHING that will help him eat them!!!
I haven’t personally tried adding veggies. Keep in mind that adding certain vegetables will most definitely alter the final color and I know for some kids, that would be a turn off. However if you were to try adding say carrots, or other similarly toned vegetables, it may work well. I do have several other fruit leather varieties, if you check my snack category.
took over 4 hours for me to cook these! are you sure your instructions are correct? even after 3 hours the fruit leather was still very goopy. :(
okay, after reading other Pinterest posts and other people comments, it would have been very helpful to specify that for your cooking times the mixture should have been thinly spread. I’m glad I’m not the only person who had this problem, but maybe next time after seeing so many people accidentally make the mixture too thick you could edit your recipe and save many people from staying up to the wee hours checking on their fruit leather. let’s hope it’s worth it!
The instructions state clearly ‘3 hours or until no longer sticky’. There is never an exact time for a recipe such as this, only a range, because of how oven temperatures vary and the thickness each individual will spread the mixture.
Not sure if I spread my mixture to thin or what but I followed this recipe and couldn’t get it to peel away from the parchment paper! Disappointed. Looks like we have to stick to store bought :(
I’m sorry you had trouble with the parchment paper. Some seem to have wonderful results with parchment, while others don’t. I have had wonderful success with silicone mats though. So, that’s something to consider for the future!
Hello, I’m Barbara, italian food photographer, in Facebook this person has published your shot and mine with his name. This is the pages: TROVA RICETTE (Facebook).
Look the photos.
Bye
Barbara Torresan
Thanks so much for letting me know!
I made these last year for the first time and they were DIVINE. I baked it on parchment, and then just rolled it and cut it. My baking time was much longer than 3 hours, but I wasn’t fussed by that. This year’s batch are currently in the oven, and I already know I’ll have to get up in the middle of the night to check on them, but no matter (it was either that or get up at 5am and make them, NO THANKS!!). I’m running the oven slightly higher at 200 for the first little while, then I’ll drop it… see if that helps to speed things along. This year I added a touch of vanilla. No kids in my house, so they last slightly longer (probably not by much though!). Yum!! I meant to make mango roll-ups, I even bought a ton of mangoes, and then I ate every single one before I could turn it into anything delicious… oops?
I’m so glad you’ve enjoyed them so much, Allison! As you found, the bake time can vary quite a bit. It depends a lot on the thickness of your mixture and oven temperature. But, it’s definitely worth any amount of time for such a tasty treat! :)
How long does this store? Should it be kept in the refrigerator?
It’s not necessary to store in the refrigerator if they’ll be eaten within a week or two. However, if you’re looking to store them for a longer time, you can store in the fridge, for likely up to a month and in the freezer for up to a year wrapped properly.
Hi Rachel ,
Being a full time working min, when I get a chance to make thinks like this I try to cook in bulk. Any idea if the shelf life? Have you ever froze them?
Thanks carrie
I have never frozen them, but I imagine they would freeze well if wrapped appropriately. Typically homemade fruit leather can keep for several weeks or longer at room temperature.
Followed this recipe to a T.
Except after 5 hours my roll ups were still wet. Tried pulling them out anyways and juSt using the finished edges but I can not get it to separate from parchment paper. Frustrated! What did I do wrong?
Fruit leather baking time will vary greatly depending on the thickness of your mixture and oven temperature. As for the parchment paper, next time you could try very lightly greasing the parchment or using a silicone mat instead. I know some people have great success with parchment while it doesn’t work for others as well.
Have you tried making it without sugar? It doesn’t really need it as the sugars in the fruit get concentrated as it dries. I have used pears, apples and strawberries and they are all lovely!
I have not. However, depending on how ripe fruit is, it may need more or less sweetener. You’re always more than welcome to try it without and see how it turns out for you.
Hi! I really want to try this but is there any way you can speed up the process? And also, can you halve or even quarter the recipe? I don’t know how they are going to turn out so I want to make a small amount first. Thanks for you help.?
It needs to be done at the time and temperature specified in the recipe. The goal is to dehydrate the fruit mixture and not bake it.
8.5 hours later, after following your directions and recipe to a T, including the size of the pan and spreading it thinly between the two pans…and I’ve still got a liquid mess. :( Wish I would have read the comments first and saved my strawberries for something else. :(
Following the instructions properly and having patience will yield successful results. If your mixture was too thick or not spread properly, it’s going to take quite a bit longer to dehydrate. Oven temperatures can also vary quite a bit. Others have had great results and the recipe would not have been posted if it didn’t work. As you can see from the pictures, it does and did work.
Tried this recipe, so very good. I only have one silicone baking mat so I spread one one parchment. The strawberry stuck to the parchment. Impossible to remove. I think I will just get another mat if I make again.
I’m glad you enjoyed it! And yes, I’ve heard mixed reviews about parchment paper. Some have had great success with it, while others haven’t. I’d definitely recommend sticking to the silicone mats as they work amazing for recipes like this.
Hi Rachel, What should the consistency look like after blending? Mine is very liquidy, is this fine or should I add more strawberries?
It should be thicker than straight juice but still pourable and easy to control where the mixture is spread. It’s not an overly thick mixture. Good luck!
Can I use wax paper or tinfoil? I’m out of parchment!
I wouldn’t recommend it. A silicone baking mat will provide best results. If you don’t have access to one, parchment should be used.
Can I use frozen strawberries or do they have to be fresh?
They don’t need to be fresh but they should be fully thawed if using frozen.
Hi, I wanted to try these out and I was wondering if I could use something other than parchment or silicon mats? I don’t have access to either of these at the moment, although I really would like to try out this recipe! Would aluminum foil work?
A silicone mat would be your best option since the fruit leather will release easily. I wouldn’t recommend using tin foil.
Hi! I was wondering if I could replace the strawberries with other fruit of the same amount? e.g. 4 cups of chopped mango?
It’s not always as simple as just swapping out one fruit for another, but you could certainly give it a try. You may need to adjust the amount of sugar or fruit for it to work. Good luck!
These came out so good!! I’m pretty sure they will be gone by tomorrow. They needed an extra hour but I sort of expected this because I never made them before. Perfect mommy/toddler project for the afternoon :) Thanks!
So glad you enjoyed them! :)
I have always wanted to try this, but have been nervous because so many have had trouble with it! Finally this past weekend I tried it, and to my delight, it turned out pretty great! My spreading could’ve been more even, so some bits were crunchy, but the taste was awesome. For anyone curious about substitutions, I used thawed frozen berries, and they worked fine. I also used stevia instead of sugar because I’m on a diet, and lime juice because I didn’t have any lemons. I’ll be making this again; thanks!
So glad you enjoyed it! :)
Can u make this without the added sugar?
You can certainly try without or at least cutting back. Others have also had success in using other sweeteners as well, such as honey.
I made this yesterday afternoon with my daughter!! I actually overbaked it a little and so the edges got a little crispy / brittle (lesson learned SLIGHTLY tacky is A-OK!!) but the middle is perfectly pliable. What a fun baking project with my 6 year old and DELICIOUS!!
So glad you both enjoyed making it! :)
What a fantastic recipe! A healthy alternative too. Did take about 6 hours but it’s totally worth it for my kitchen smelling like a sweet shop all day. I think next time I might reducing some of the liquid on the job before dehydrating in the oven.
So glad you enjoyed it!
I tried this recipe and it came out beautifully, It took a bit longer than 3 hours to dry sufficiently, but that would depend on the moisture content of the strawberries.
Thank you for a delicious recipe.
So glad you enjoyed it, Karolin!
I have to question.
1- can I do it in my dehydrator and if yes for how long does it need to cook for?
2- can I use lime instead of lemon if I don’t have or find lemons? How many do I use if the answer is yes?. thank you
You definitely could do it in a dehydrator but I don’t have timing recommendations for you. As far as swapping in a lime, you could certainly try it. If you do, you’ll only need a single lime for that small amount.